Browse thousands of constantly-updated listings and search by location, brand, and boat type See more...
Advice
Connect with our expansive community and tap into the knowledge base of the most dedicated boaters around. See more...
Shop Products
Browse and search for hundreds of thousands of boat parts, accessories, and supplies to suit your every need.
View Larger Photos
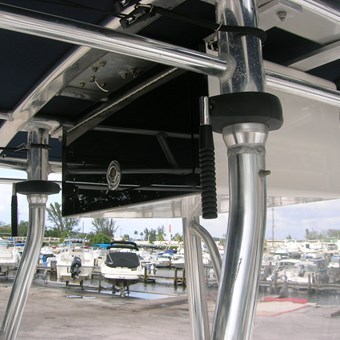
Electronic Boxes - Rough Water Products
Rough Water Marine Electronics Boxes
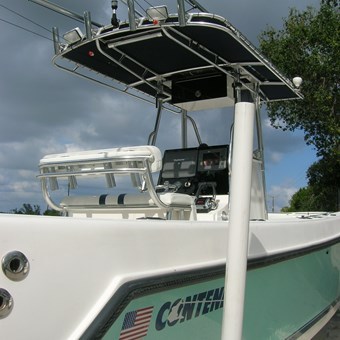
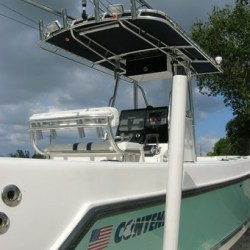
Marine Electronic Boxes have large rounded corners. They are great for any size center console boat with a T-Top.
Features
1/2" black acrylic door and frame
Average fiberglass thickness is 3/8"
Gem stainless steel locking slam latch
Gas shocks holds door securely open to access electronics
Item#
Dimensions
Weight
RWREB24B
24"L x 15"D x 10"H
21 lbs
RWEB28B
28"L x 16"D x 11-1/2"H
36 lbs
RWEB30B
30"L x 16"D x 11"H
40 lbs
RWEB34B
34"L x 16"D x 11"H
42 lbs
How to Make an Electronic Box (Video)
How to make electronic boxes presented by C&M Marine Products. ...read more
Video Transcription
Hi, I’m Mark from C&M Marine Products. We are standing in our storeroom here out in Lake Placid, Florida. Today’s show is going to be about manufacturing Electronic Boxes. These are Electronic Boxes or E-Boxes as they are also called. They are on center console boats. You’ll see them on boats from 16 foot up to 40 foot.
Our boxes are made two ways. We’ve got a fiberglass body with a half inch, black acrylic door and frame. We’ve got 4 different sizes: we have our 24”, 28”, 30” and 34”. Today what we are going to do is show you how we make them. We’ll go out back into our fiberglass shop and we are going to show you how we build the fiberglass bodies for these. Then afterwards we are going to take you across the street where they do all the assembly and we are going to put these together.
One of the things that is special about our boxes is that we use a cast stainless steel lockable latch plus a nice gas shock there to make sure it will hold the door open securely.
We also manufacture about 250 items. In our showroom here we have a few examples if you want to take a look a see.
Right now let’s head out back to our fiberglass shop and I’ll show you how we build them. Okay, we are in the fiberglass shop and we are in one of the spray booths here. This is a mold and out of this mold we are able to build our fiberglass body. This is for a 24” box. This mold is already waxed and ready for gel coat. Our gel coat guy is going to come in and shoot this with a white gel coat. After the gel coat dries, we’ll go back and look for any light spots, touch it all up, then we’ll be able to go in and lay our fiberglass. After that we pull the part and take it out to the trim booth where we’ll trim it.
First things first, let’s go ahead and spray the gel coat. Here comes Chris who is going to spray the gel coat for us, so I’m going to get out of the way. Okay – this has been sitting for about an hour and we’ve let it dry real good. Checked it for any light spots and touched it up where needed. Chris is going to come back in with our chopper gun and he’s going to build the box. The chopper gun is basically going to shoot our fiberglass, resin, and our MDK in there as well –our catalyst. All this is going to come together and we’re going to spray it all at one time so it’s a real fast and efficient way to build this box about a quarter of an inch thick. All our boxes are real heavy – that’s why we sell a lot of them. They are the best in the market out there.
Chris is going to come spray this for us then a laminator is going to come in and he is going to use a laminating roller which is designed to roll the air out that is trapped between the fiberglass and the resin. Once that dries, we’ll come back and sand out any burrs, and do a second coat which will bring us up to about a quarter an inch or almost 3/8 of an inch.
Now we’ve already gotten done with the second layer and sanded down the burrs that will usually appear along the edge here. We are now going to come in and do a gel coat on the inside. That gives us a nice clean finish. Chris is coming back in to gel coat this then we need to pull it out of the mold. After that we are going to take it out to be trimmed.
We are now in the small building next door where we trim all of our parts. You saw the guys pull this out of the mold – and this part here is what we’ve got to trim. This is basically a sacrificial flange. It helps us get this part out of the mold. So we are also going to sand this a little bit then come back in with a special tool to trim all this right off.
That’s as easy as it is. You can see he has trimmed off all this flange. Now take a look at the thickness of this box. This is a 1/4” or close to 3/8”. This is why these are the best electronic boxes on the market. People buy hundreds of these every month. Now let’s take this across the street for assembly.
Like I said earlier, we build this in two ways. You’ve got the fiberglass body that you just saw us build and this is one of the doors. It’s made of solid black acrylic for both the door and the frame. Here is our real nice cast stainless steel lockable latch made by gem products. Awesome little piece. Also, we put the nice gas shock on there instead of using a little spring like a lot of guys use – we use this shock. Here is one all put together but we are going to show you how.
One of the products that we use is this Bostik 940 which is a super high strength adhesive. This is going to glue the lid and the body together. Once it’s glued, we let it sit for 24 hours and it’s not ever coming apart.
Now that it has set for 24 hours it is ready for hardware. We are going to put our latch and our gas shock on this. Pretty simple then we’ll be ready to get it buffed up and boxed up then it’s ready to go. read less


 Boats for Sale
 Advice


![[ imageAlt]](/mall/image/view/1/2/rwreb24b-1_2.jpg)